Tutorial
How to Work With unettest
I think it will be easiest to show how to use unettest with terminal screen sessions.
It’ll reveal how to think with unettest most directly.
Note
In these, the infant days of unettest, it was going by nginxray. Please make
the mental substitutions until I get around to updating the screenshots :)
Setup
You must first acquire unettest. You can get a copy here:
Add it to your path (/usr/local/bin/ is an option). You can use it as it or give it a
snappy alias.
You can see how to write these config files here: unettest Configuration.

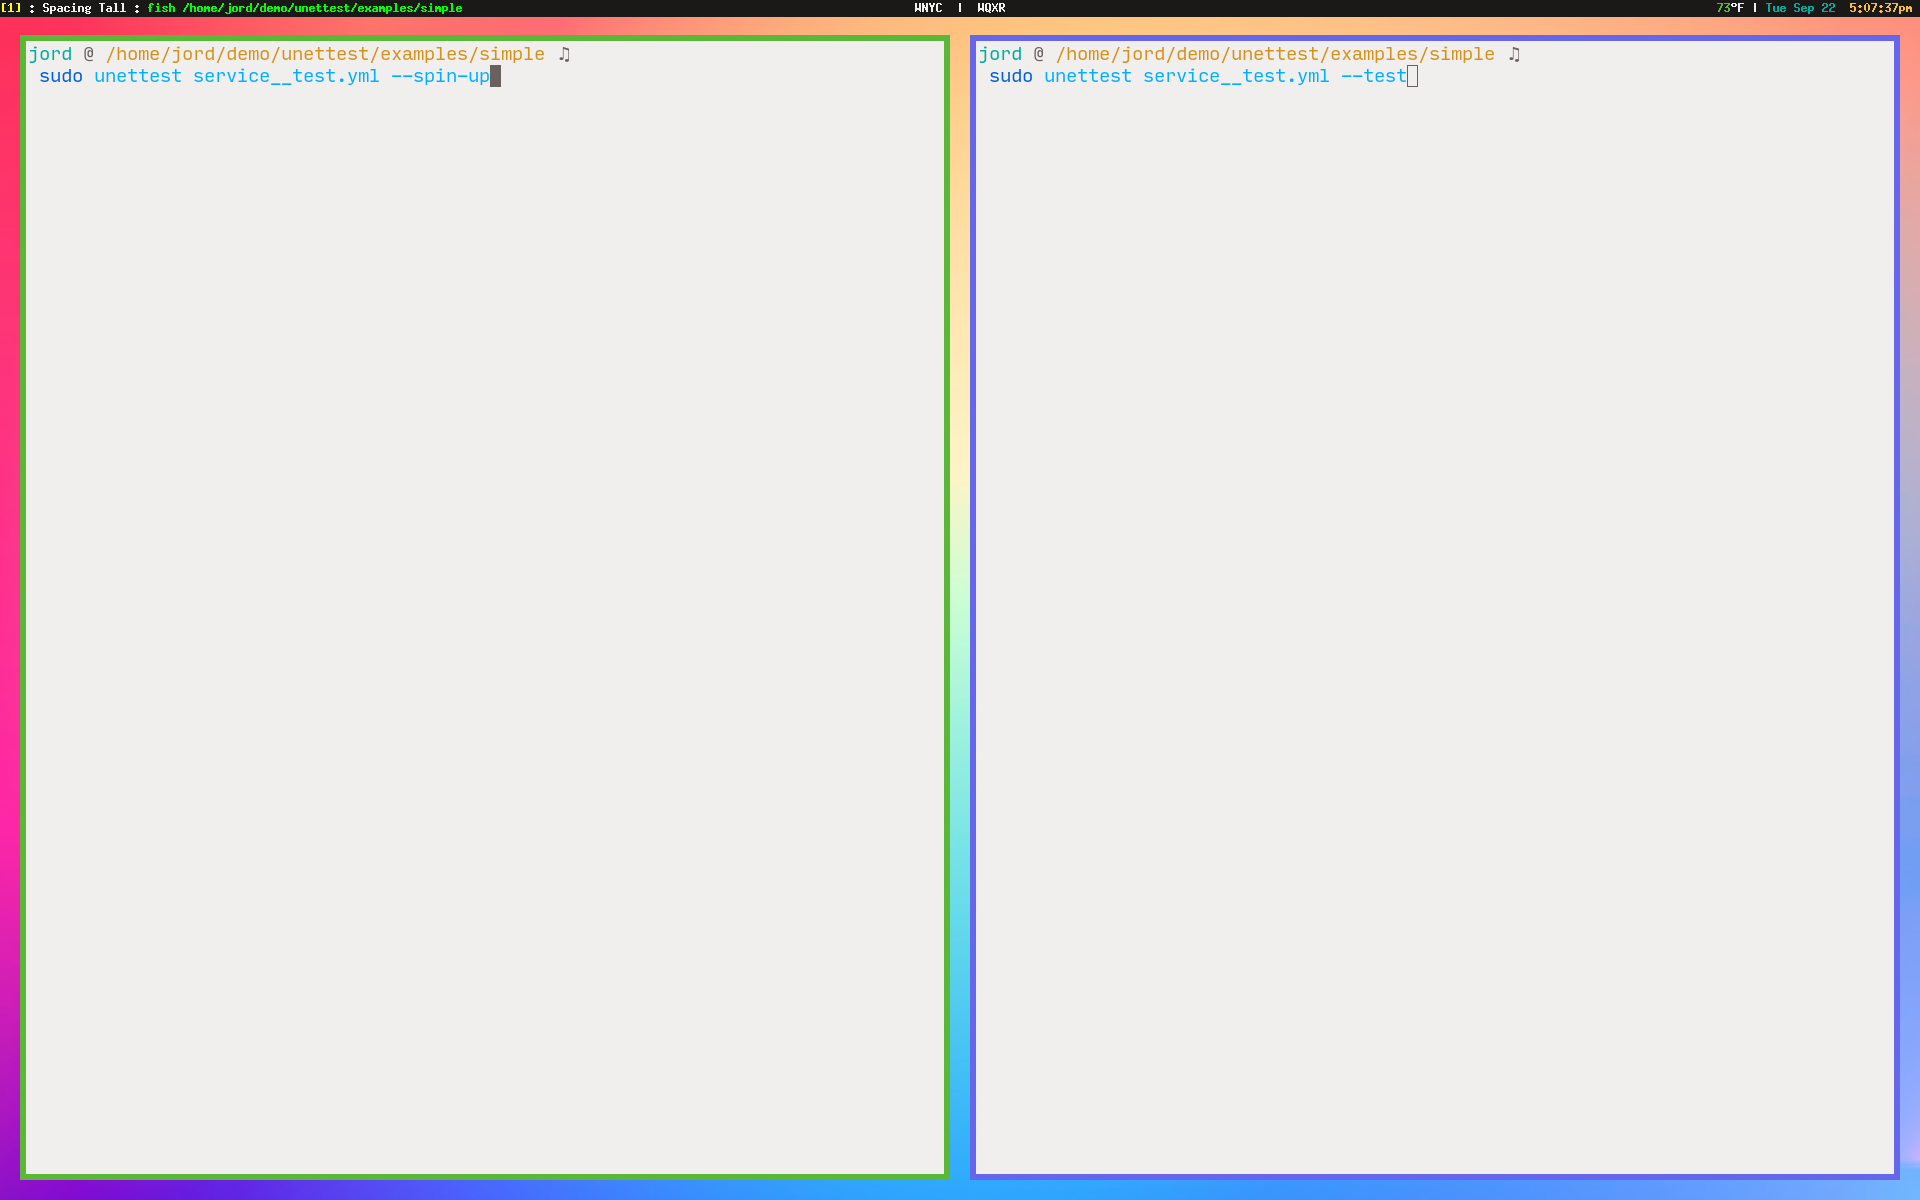
Go
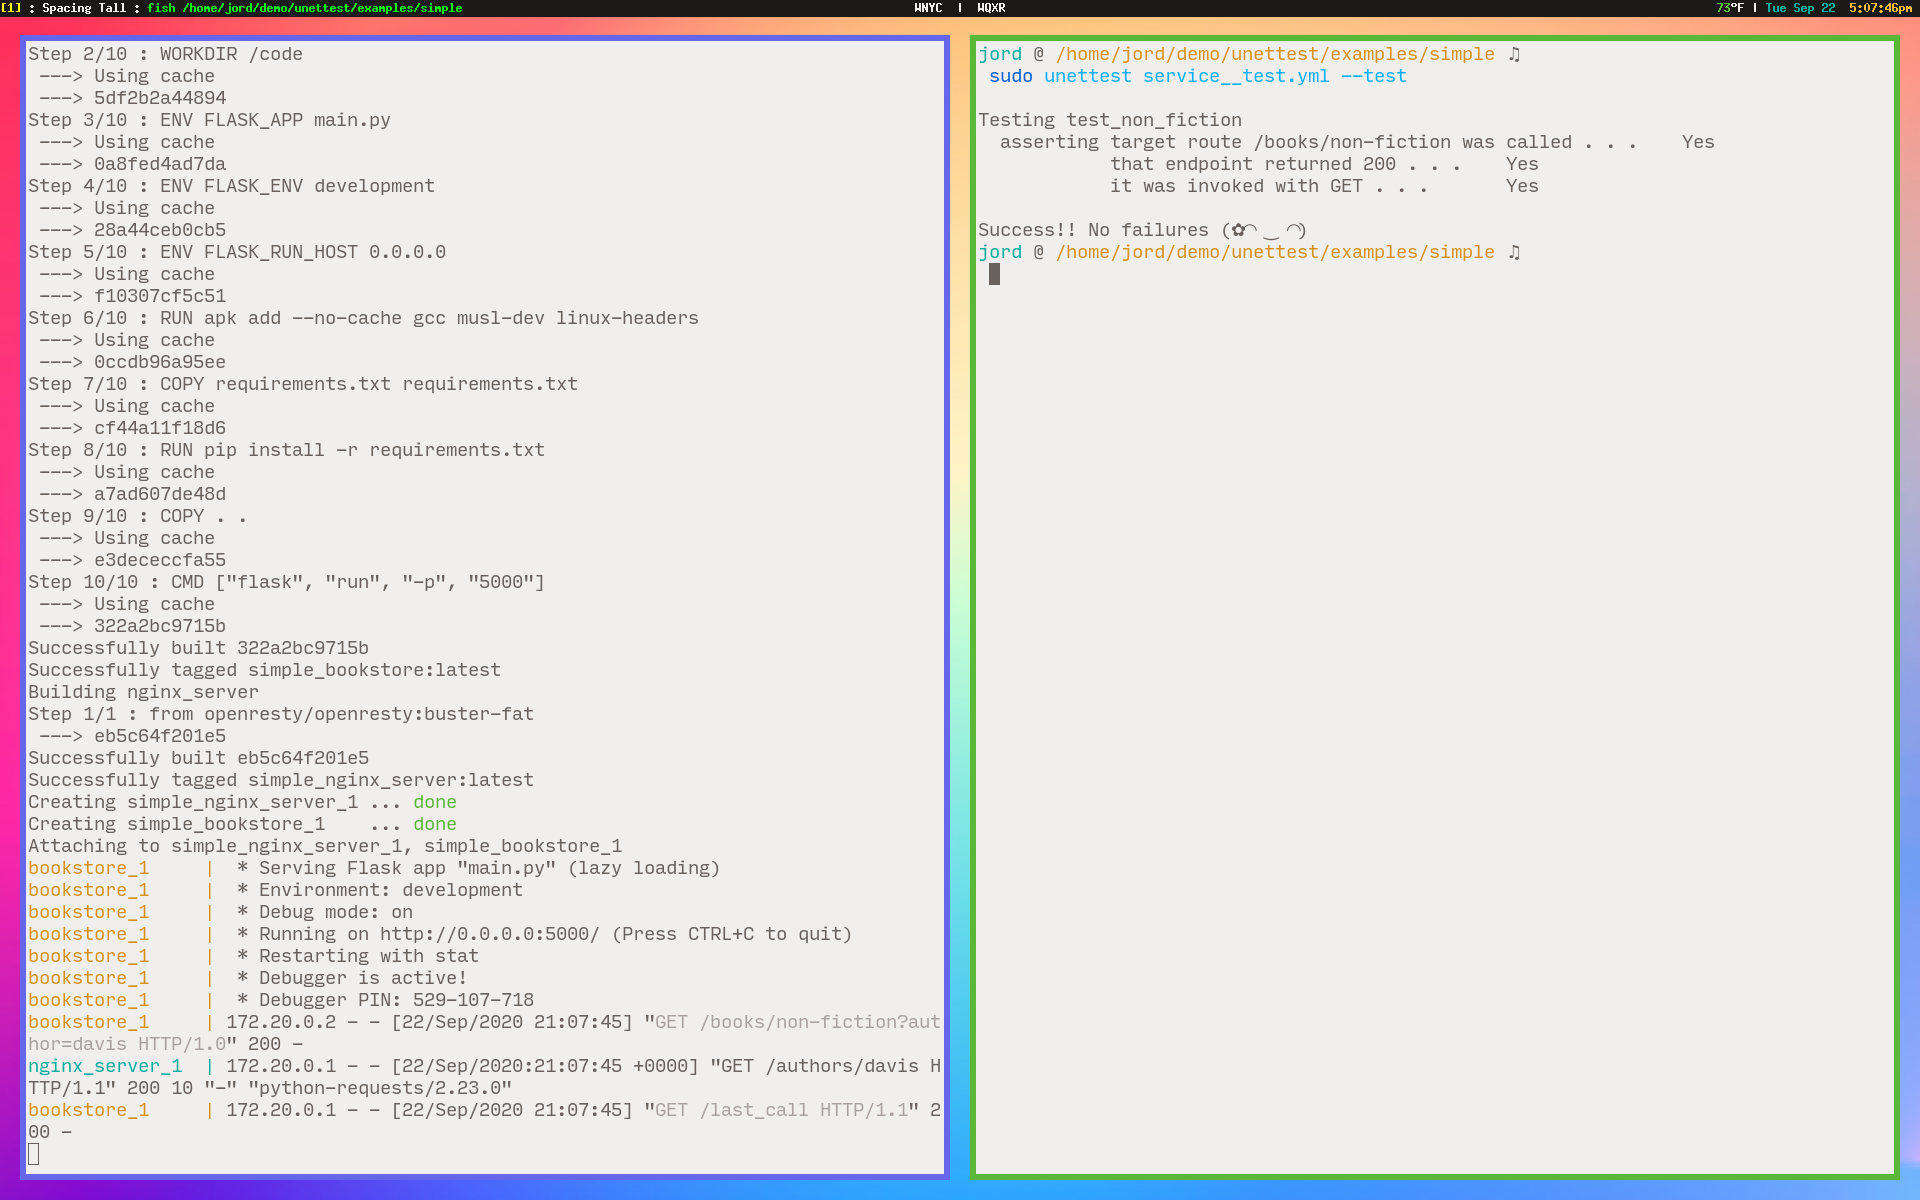
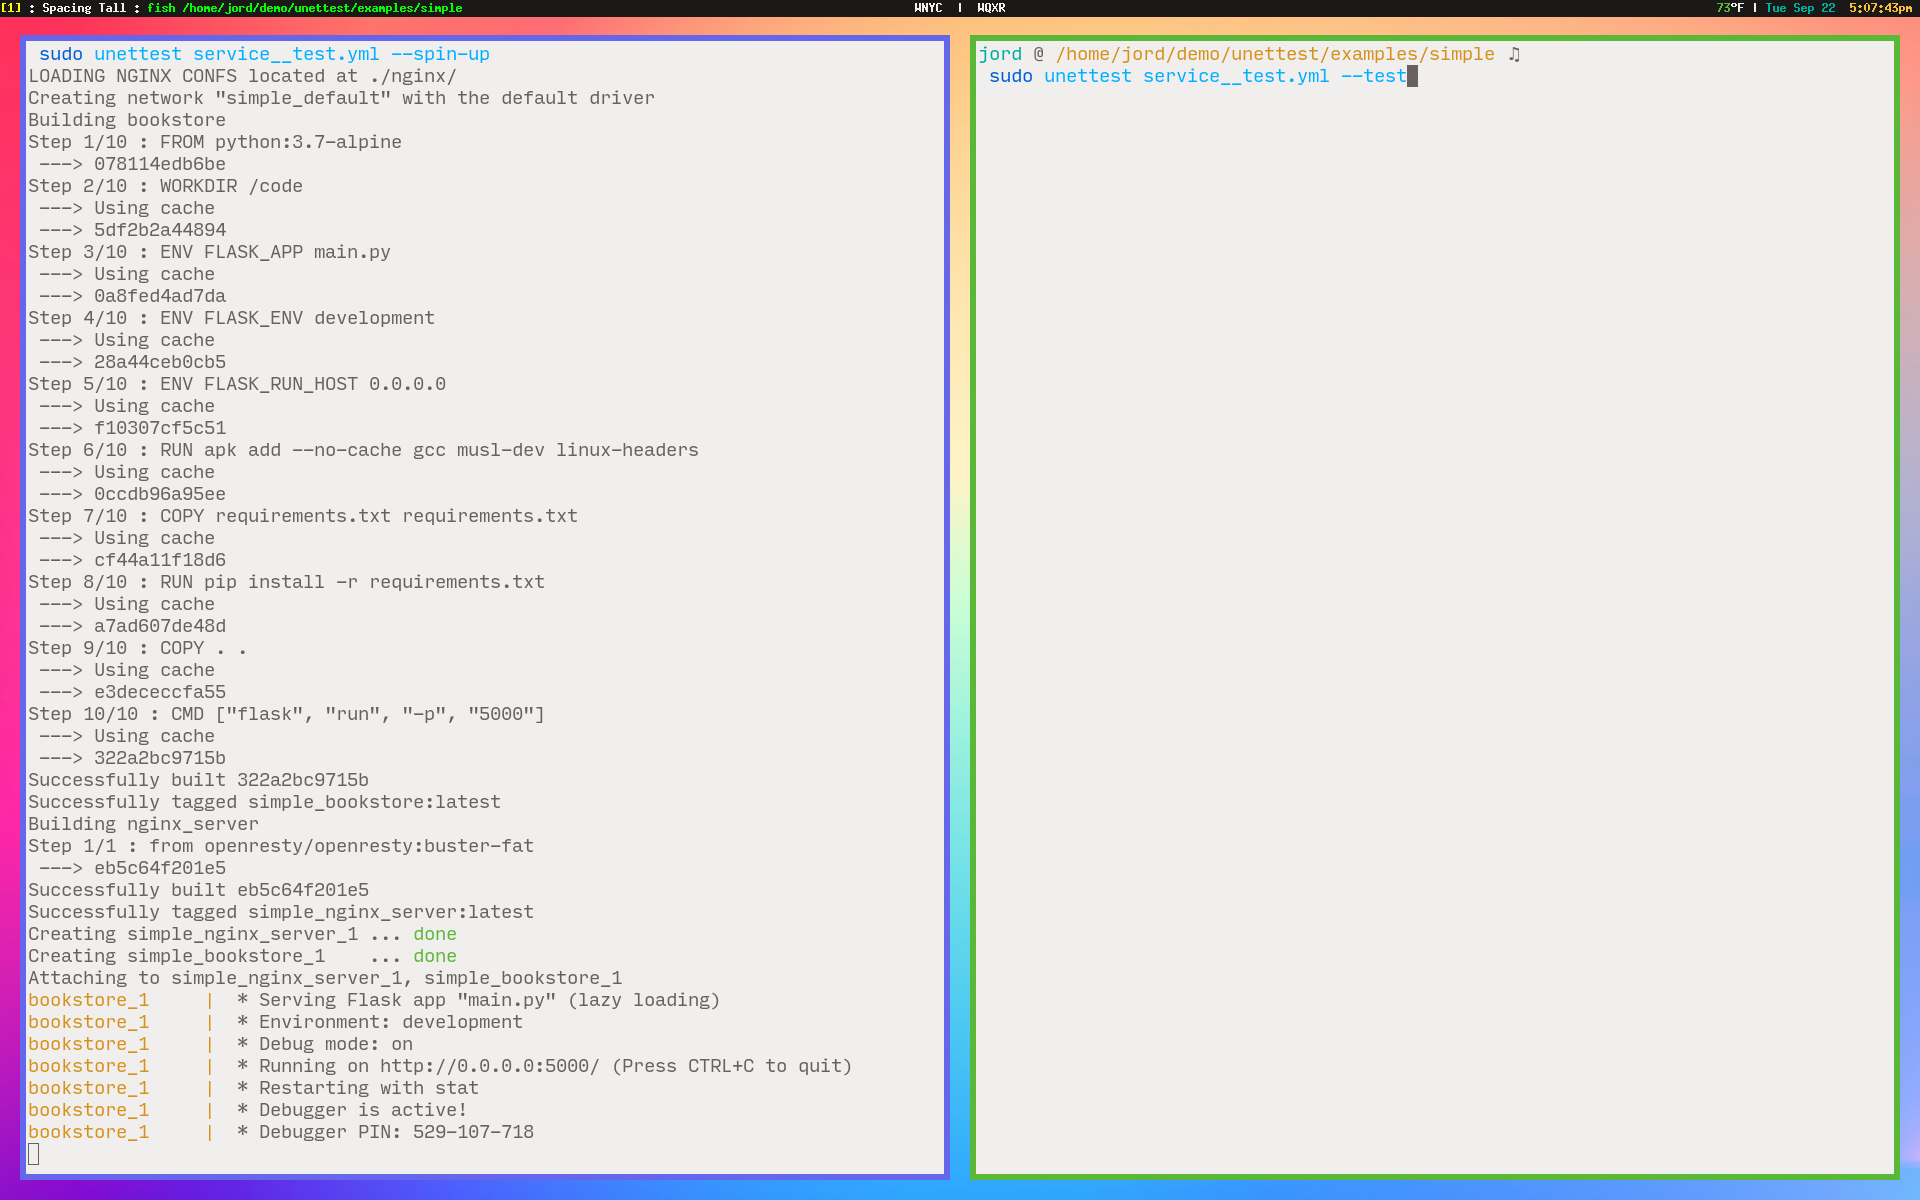
Firing off the right-side unettest with a -t to run the “tests”.
See how the contents of those tests are reported in the logs on the left. Super easy to develop with! Like shining a flashlight in a dark corner.
Tests
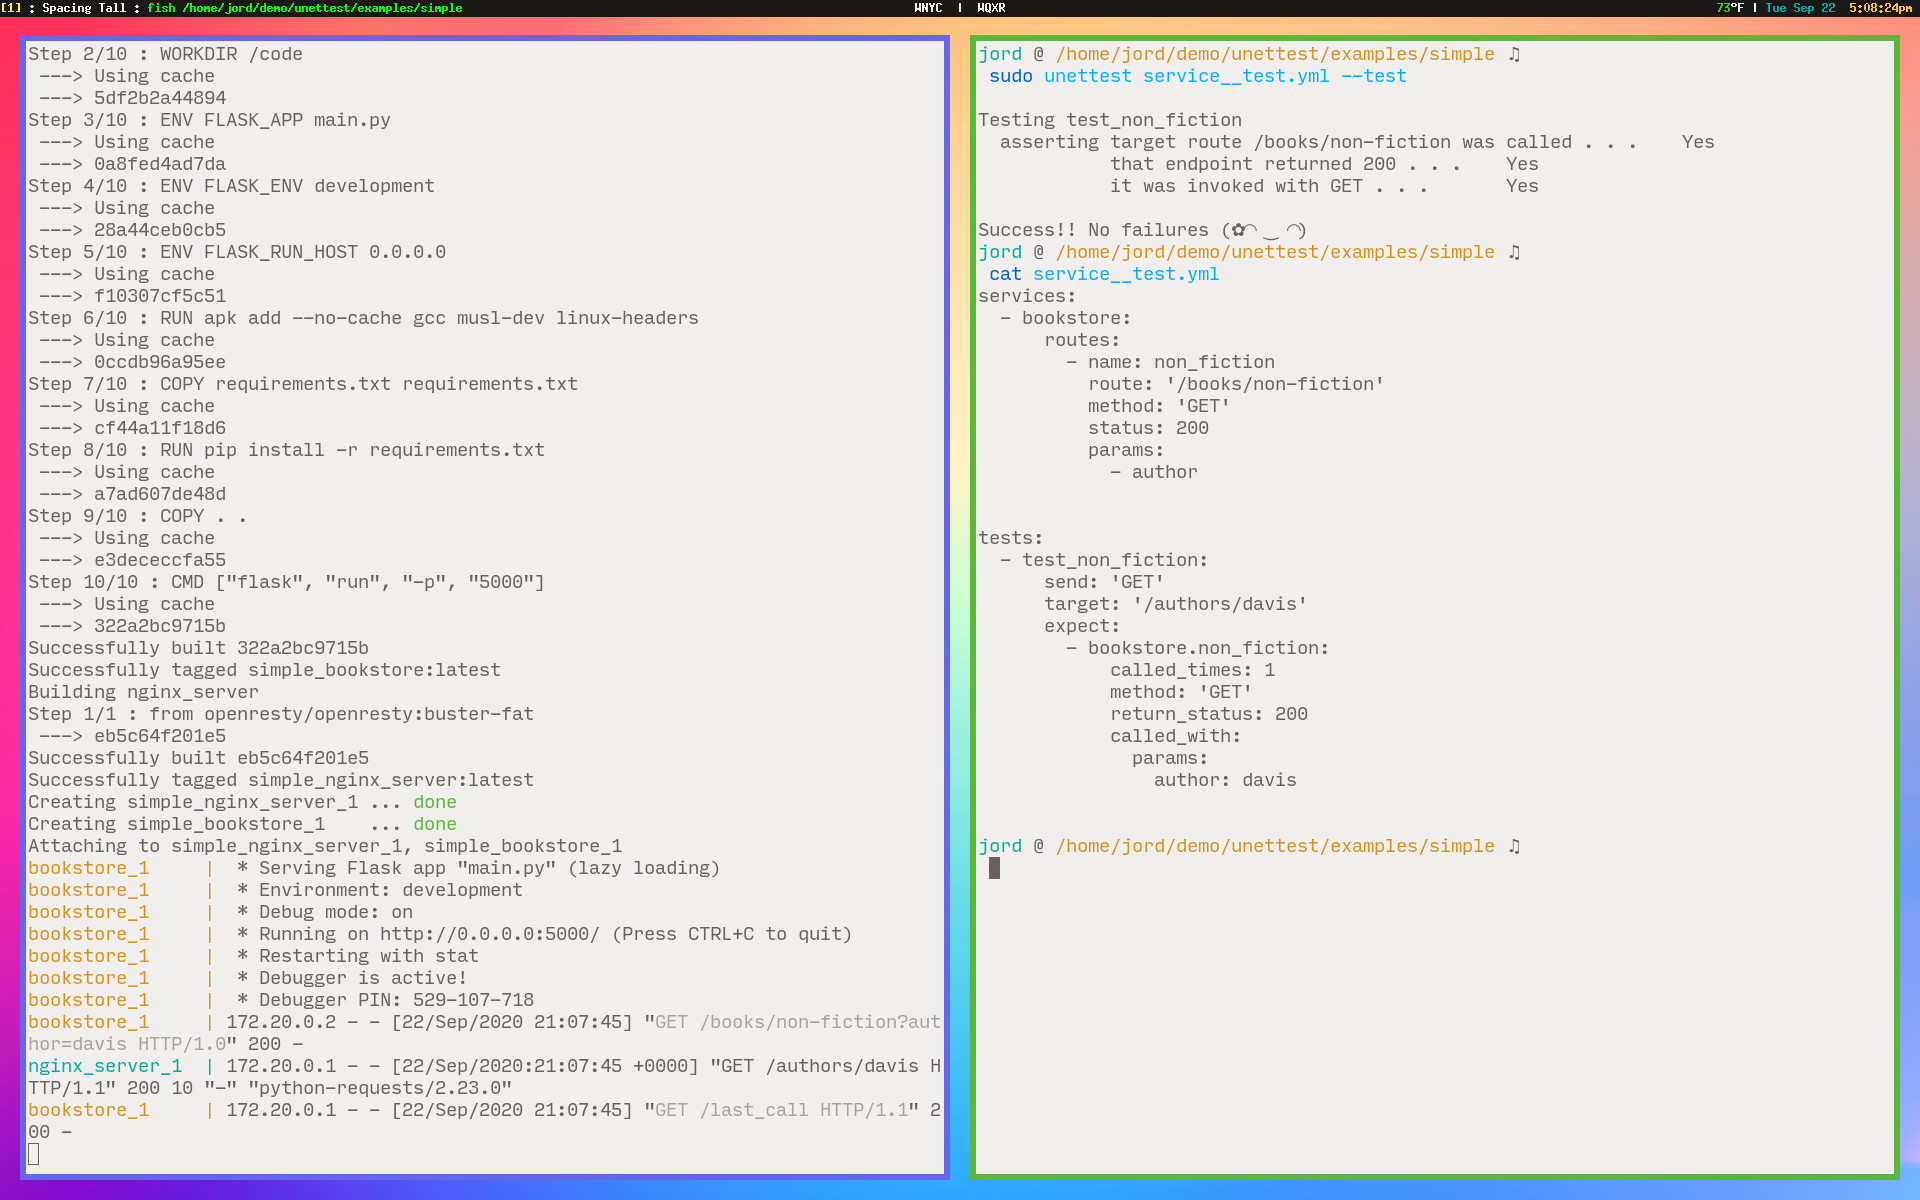
This is the logical structure of the systems under test and the tests excercising their functionality.
A Network REPL!
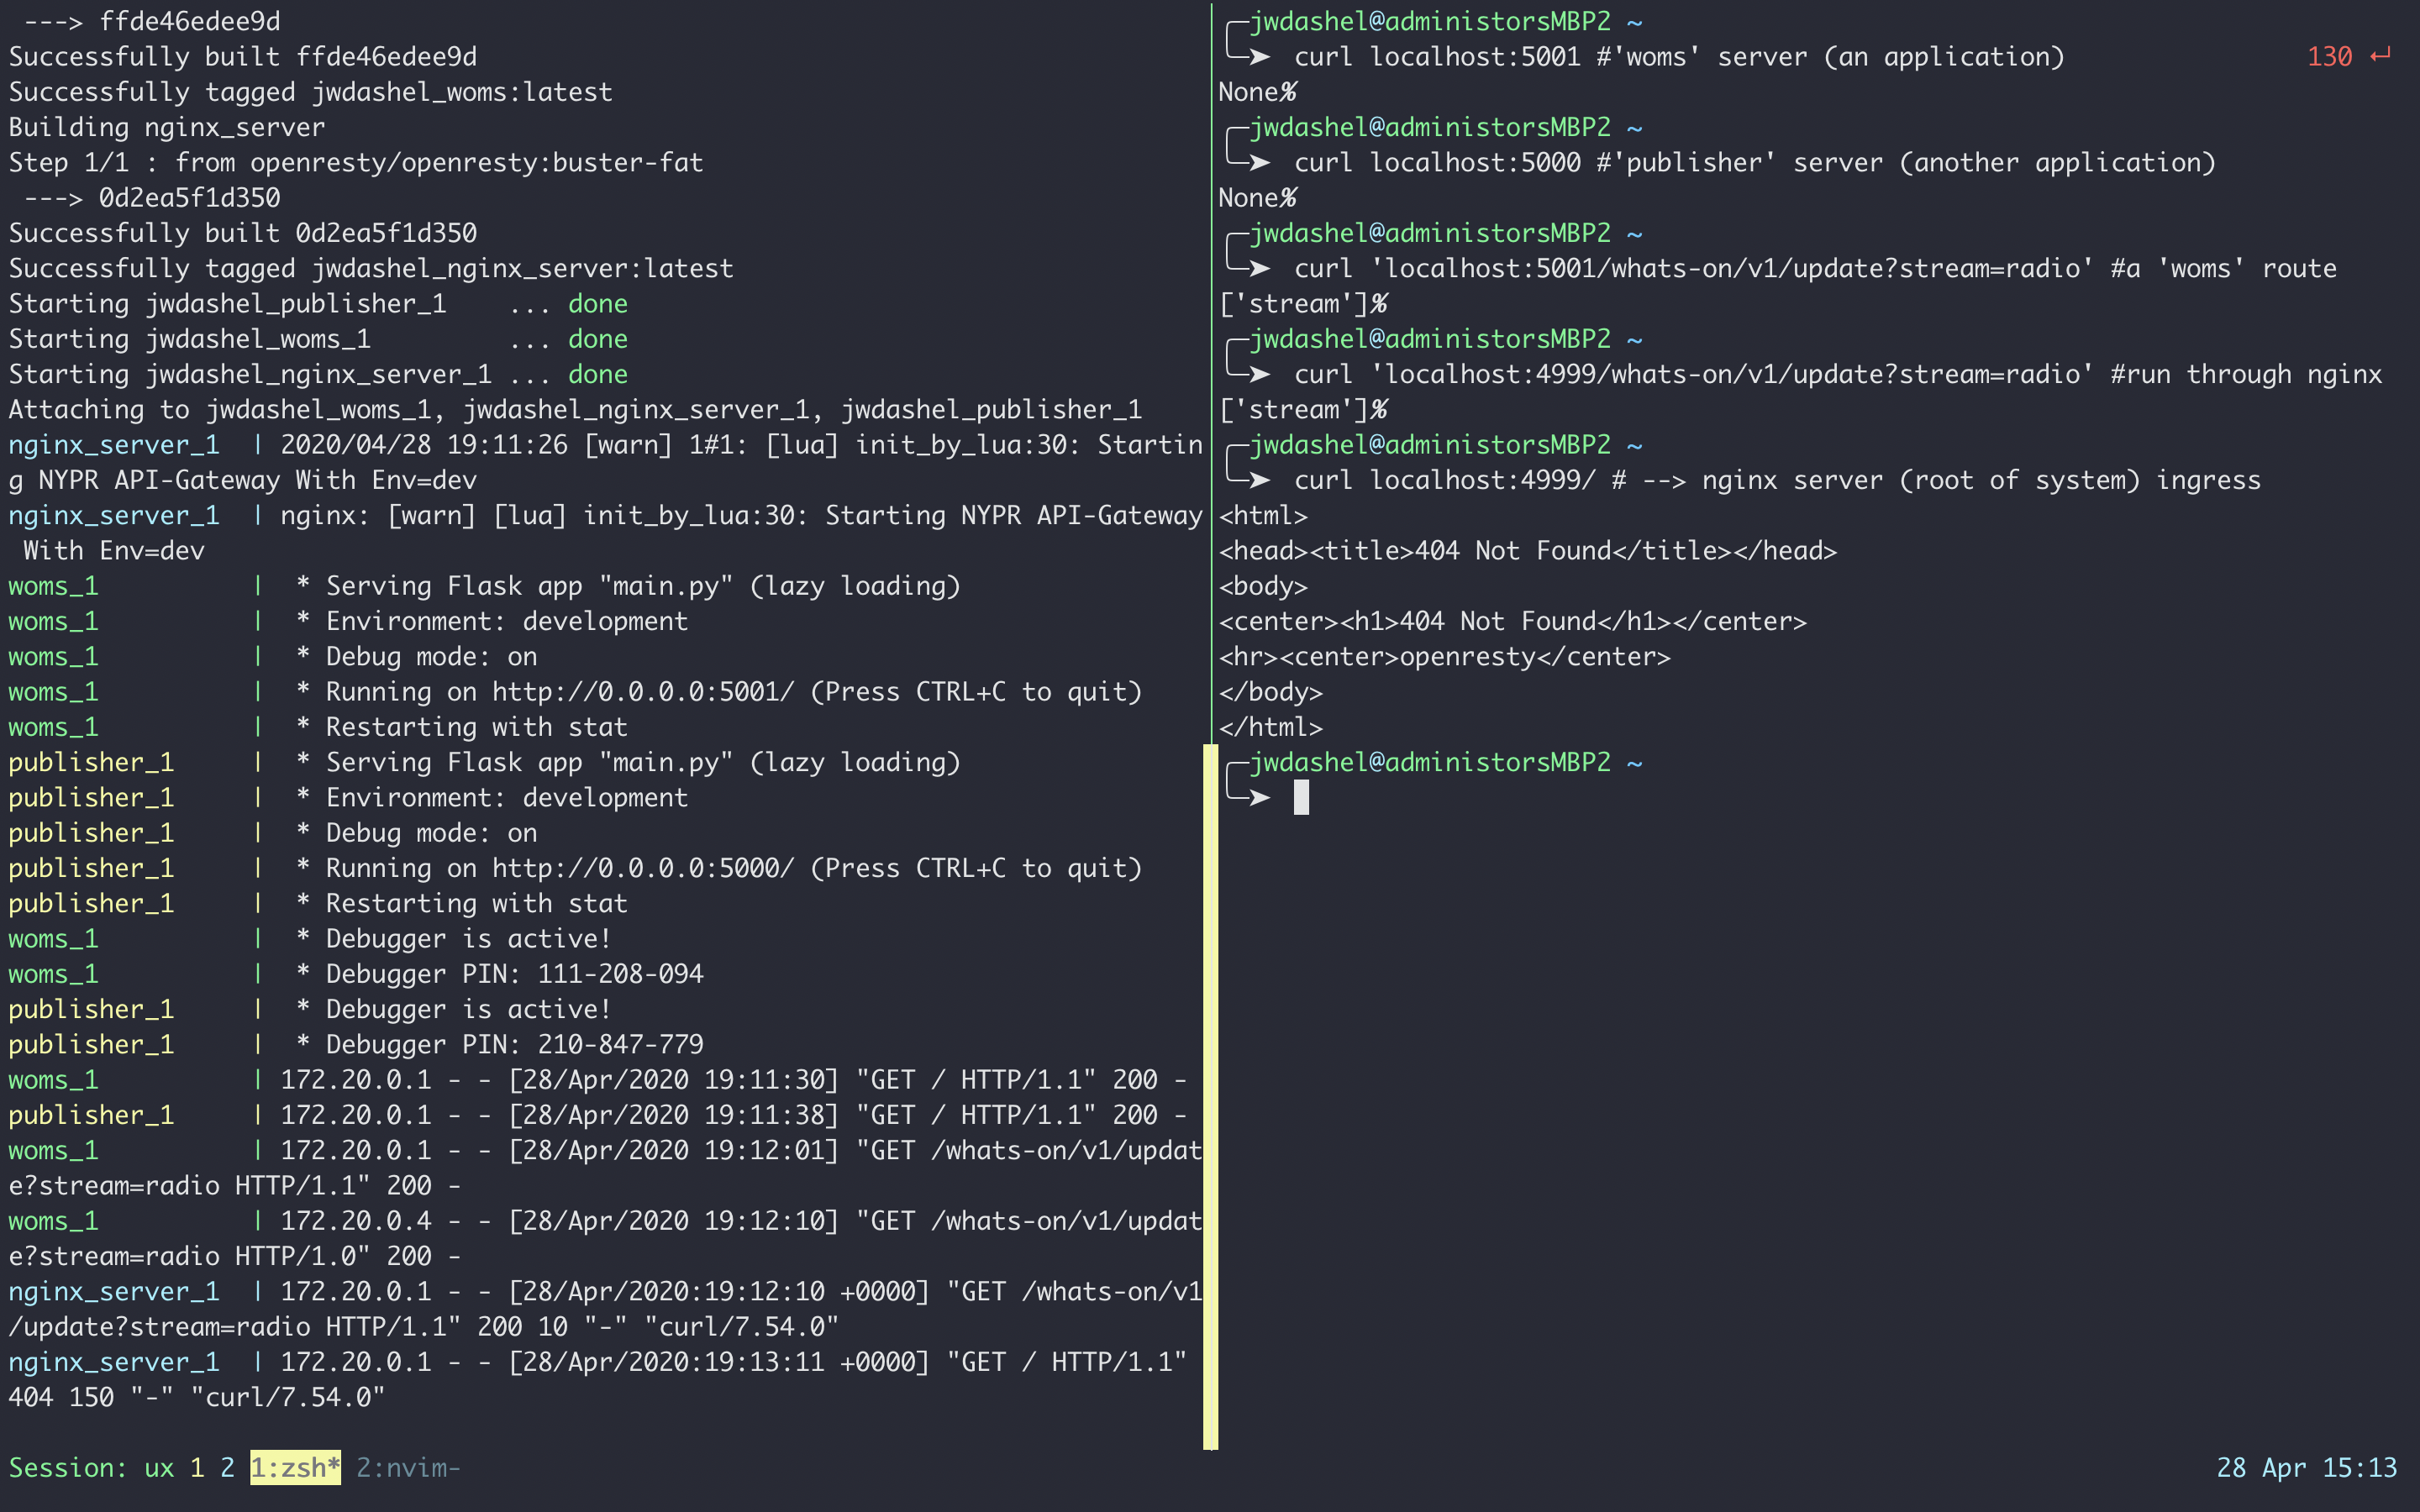
You can work with any number of services like a REPL. You can access a service directly (I
would consider this going “around”) or through the NGINX server being run by unettest.